Use Google Analytics To Check out Your Important Backlinks

Check Backlinks with Google Analytics
The number and nature of the backlinks to a website is one of the most important ranking factors, that is still being used in today's user-oriented organic search results. It helps determining the popularity of a website. Rank metrics, such as Google PageRank and Moz Domain/Rank Authority use it for ranking websites. So the more backlinks you have (quality ones, not cheap and spammy ones that people often purchase), the better your site tends to perform in search results. Knowing what your backlinks are, and where they're coming from can provide you with useful insights, and can help you filter out the cheap links in favour of quality ones. Let's take a look at how you can look at your website's backlinks in Google Analytics.

What can you do with backlink analysis?

Backlink analysis can be invaluable for the performance of your website in search engines. The first and most useful information you could gather from your backlink data is the amount and nature of broken links. External links might be pointing to a page on your website that you have moved or deleted. Hence, the backlink is going useless, unless you do something about it.

You can also check out the trends, and see what type of pages are being linked by other website. In other words, you can find out what people like about your website, so much so that they are linking to it. You can use this information to glean trends data, and create more such content.

Another very important insight can be seen from the type of websites that are linking to you. For example, if a high quality website has given you a backlink, you should investigate, and find out what and why they liked. You can then stay in touch with them and maintain high quality connections that will ultimately help your website's ranking.

Using Google Analytics for backlink analysis

Google Analytics offers one of the tools you can use to analyze your backlinks. To use this tool, follow these steps.

  • Log into your Google Analytics Account, and then click on the website property you want to see backlinks for.
  • Look to left sidebar, and there you'll see a Standard Reports section. Click on the Traffic Sources tab, expand the Social section, and then click onTrackbacks.
Trackbacks

A trackback is basically a notification for every time a website links to another. It is a record of what page on one website linked to another page on another website. Each trackback in this case will contain the linking URL, and the linked URL. You can also see how many visits were generated as a result of each backlink, so that you can contact that website and arrange for more backlinks to increase your traffic!
  • Now, you will see a list of all trackbacks to your website within a specific period of time. You can change this period, and show backlinks from a month ago, or a week ago, and so on. This feature is useful when you want to see how many backlinks you 'scored' during a particular campaign.
Time period

Got any questions? Feel free to ask in the comments section below. Also tell us what tools are you using for your backlink profile analysis?

How to Allow Users to Share Quotes from your WordPress Posts

How to Allow Users to Share Quotes from your WordPress Posts
Most newspapers and main stream media sites often add customized quotation blocks in their articles. Why? Well because quotes are probably the most memorable and shared part of the article. Quotes have a potential to go viral. Recently we showed you 9 different design examples that you can use to customize blockquote in WordPress. In this article, we will show you how to allow users to share quotes from your WordPress posts to Facebook and Twitter.
Our goal is to highlight a quote from the article and add share icons. Final result:
Share a pullquote using pushquote
First thing you need to do is install and activate the RealTidBits PushQuote plugin. After activating the plugin, go to the post editor by clicking Posts » Add New. If you are using the visual editor, then you will see a pull quote button among other icons in the post editor.
PullQuotes Icon WordPress Visual Editor
Select the lines in your post content that you want to display as a pullquote and press the pullquote button on the editor. It will ask you whether you want to align it to the left or right, and you will be done.
Alternately if you are using the text editor, then you can also use the shortcode around the quote content like this:
[pullquote]Text from your article to be used as pullquote goes here[/pullquote].
By default, it will position the quotes to the left. If you want position right, then add the code like so: [pullquote position="right"]
RealTidBits PushQuote plugin uses tidbit.es for URL Shortening. We wish there were an option for users to change it. However, you can still change the way plugin looks by editing the stylesheet located in CSS folder. You can use an FTP program to edit the file pullquote.css located in /wp-content/plugins/pushquote/css/. You can also edit the stylesheet from your WordPress admin panel. Go to Plugins » Editor and use the drop down menu to select Pushquote Plugin. On your right hand you will see a list of files, click on pullquote.css file to edit it.
Quotation blocks are used to catch user’s attention by highlighting the most interesting bits from the article. This is what makes them memorable and the most shareable. We hope this article helped you add sharing buttons to your quotation blocks in WordPress. Would you be using this on your site? Let us know by leaving a comment below.

Beginner’s Guide to Preventing Blog Content Scraping in WordPress

Beginner’s Guide to Preventing Blog Content Scraping in WordPress
If you write original content day in and day out, you already are aware of the fact that your posts will end up on bunch of SPAM sites within a few days sometimes even few minutes. Some users even noted that the site with stolen content outranked the original post. It is very frustrating as a website owner to see that someone is stealing your content without permission, monetizing it, outranking you in SERPs, and stealing your audience. Content Scraping is a huge problem these days considering that it is so easy for someone to steal your content. In this article, we will cover what is blog content scraping, how to catch content scrapers, how to deal with content scrapers, how you can reduce and prevent content scraping, how to take advantage of content scraping, how to make money from content scrapers, and is content scraping ever good?

What is Blog Content Scraping?

Blog content scraping is an act usually performed with scripts that extract content from numerous sources and pulls it into one site. It is so easy now that anyone can install a WordPress site, put a free or commercial theme, and install a few plugins that will go and scrape content from selected blogs, so it can be published on their site.

Why are they Stealing my Content?

Some of our users have asked us why are they stealing my content? The simple answer is because you are AWESOME. The truth is that these content scrapers have ulterior motives. Below are just few reasons why someone would scrape your content:
  • Affiliate commission – There are some dirty affiliate marketers out there that just wants to exploit the system to make few extra bucks. They will use your content and other’s content to bring traffic to their site through search engine. These sites are usually targeted towards a specific niche, so they have related products that they are promoting.
  • Lead Generation – Often we see lawyers and realtors doing this. They want to seem like industry leaders in their small communities. They do not have the bandwidth to produce quality content, so they go out and scrape content from other sources. Sometimes, they are not even aware of this because they are paying some scumbag $30/month to add content and help them get better SEO. We have encountered quite a few of these in the past.
  • Advertising Revenue – Some folks just want to create a “hub” of knowledge. A one-stop-shop for users in a specific niche. If I had a penny for every time someone has done this with our content, then we would have a few hundred pennies. Often we notice that our site content is being scraped. The scraper always replies, I was doing this for the good of the community. Except the site is plastered with ads.
These are just a few reasons why someone would steal your content.

How to Catch Content Scrapers?

Catching content scrapers is a tedious task and can take up a lot of time. The are few ways that you can utilize to catch content scrapers.
Search Google with Your Post Titles
Yup that is as painful as it sounds. This method is probably not worth it specially if you are writing about a very popular topic.
Trackbacks
If you add internal links in your posts, you will notice a trackback if a site steals your content. This way is pretty much the scraper telling you that they are scraping your content. If you are using Akismet, then a lot of these trackbacks will show up in the SPAM folder. Again, this will only work if you have internal links in your posts.
Webmaster Tools
If you use google webmaster tools, then you are probably aware of the Links to your site page. If you look under “Traffic”, you will see a page that says Links to your site. Chances are your scrapers will be among the top ones there. They will have hundreds if not thousands of links to your pages (considering that you have internal links).
Links to Your Site - Google Webmaster Tools
FeedBurner Uncommon Uses
If you have setup Feedburner for your WordPress blog, then you can see some uncommon uses. In the Analyze Tab under Feed Stats, you will see “Uncommon Uses”. There you will see a list of sites.
FeedBurner Uncommon Uses

How to Deal with Content Scrapers

There are few approaches that people take when dealing with content scrapers. The Do Nothing Approach, Kill them all approach, Take Advantage of them approach.
The Do Nothing Approach
This is by far the easiest approach you can take. Usually the most popular bloggers would recommend this because it takes A LOT of time fighting the scrapers. This approach simply recommends that “instead of fighting them, spend your time producing even more quality content and having fun”. Now obviously if it is a well-known blog like Smashing Magazine, CSS-Tricks, Problogger, or others, then they do not have to worry about it. They are authority sites in Google’s eyes.
However during the Panda Update, we know some good sites got flagged as scrapers because google thought their scrapers were original content. So this approach is not always the best in our opinion.
Kill them all Approach
The exact opposite of the “Do Nothing Approach”. In this approach, you simply contact the scraper and ask them to take the content down. If they refuse to do so or simply do not reply to your requests, then you file a DMCA (Digital Millennium Copyright Act) with their host. In our experience, majority of the scraping websites do not have a contact form available. If they do, then utilize it. If they do not have the contact form, then you need to do a Whois Lookup.
Whois Lookup
You can see the contact info on the administrative contact. Usually the administrative, and technical contact is the same. The whois also shows the domain registrar. Most well-known web hosting companies and domain registrars have DMCA forms or emails. You can see that this specific person is with Hostgatorbecause of their nameservers. HostGator has a form for DMCA complaints. If the nameserver is something like ns1.theirdomain.com, then you have to dig deeper by doing reverse IP lookups and searching for IPs.
You can also use a third party service for DMCA.com for takedowns.
Jeff Starr in his article suggest that you should block the bad guy’s IPs. Access your logs for their IP address, and then block it with something like this in your root .htaccess file:
1Deny from 123.456.789
You can also redirect them to a dummy feed by doing something like this:
1RewriteCond %{REMOTE_ADDR} 123\.456\.789\.
2RewriteRule .* http://dummyfeed.com/feed [R,L]
You can get really creative here as Jeff suggests. Send them to really large text feeds full with Lorem Ipsum. You can send them some disgusting images of bad things. You can also send them right back to their own server causing an infinite loop which will crash their site.
The last approach that we take is to take Advantage of them.

How to Take Advantage of Content Scrapers

This is our approach of dealing with content scrapers, and it turns out quite well. It helps our SEO as well as help us make extra bucks. Majority of the scrapers use your RSS Feed to steal your content. So these are some of the things that you can do:
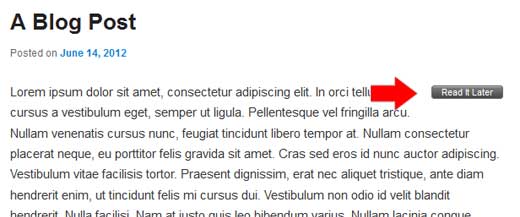
  • Internal Linking – You need to interlink the CRAP out of your posts. With theInternal Linking Feature in WordPress 3.1, it is now easier than ever. When you have internal links in your article, it helps you increase pageviews and reduce bounce rate on your own site. Secondly, it gets you backlinks from the people who are stealing your content. Lastly, it allows you to steal their audience. If you are a talented blogger, then you understand the art of internal linking. You have to place your links on interesting keywords. Make it tempting for the user to click it. If you do that, then the scraper’s audience will too click on it. Just like that, you took a visitor from their site and brought them back to where they should have been in the first place.
  • Auto Link Keywords with Affiliate Links – There are few plugins like Ninja Affiliate and SEO Smart Links that will automatically replace assigned keywords with affiliate links. For example: HostGatorStudioPressMaxCDNGravity Forms<< These all will be auto-replaced with affiliate links when this post goes live.
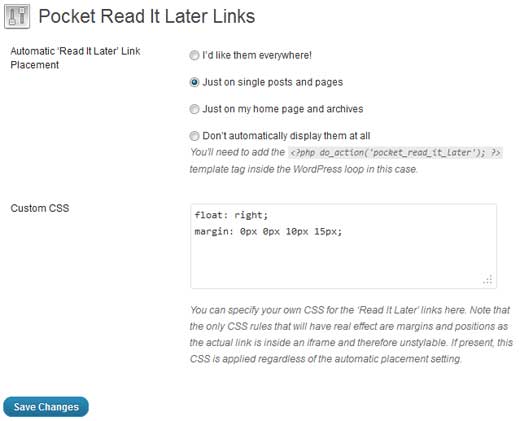
  • Get Creative with RSS Footer – You can either use the RSS Footer or WordPress SEO by Yoast Plugin to add custom items to your RSS Footer. You can add just about anything you want here. We know some people who like to promote their own products to their RSS readers. So they will add banners. Guess what, now those banners will appear on these scraper’s website as well. In our case, we always add a little disclaimer at the bottom of our posts in our RSS feeds. It simply reads like “How to Put Your WordPress Site in Read Only State for Site Migrations and Maintenance is a post from: WPBeginner which is not allowed to be copied on other sites.” By doing this, we get a backlink to the original article from scraper’s site which lets google and other search engines know we are authority. It also lets their users know that the site is stealing our content. If you are good with codes, then you can totally get nuts. Such as adding related posts just for your RSS readers, and bunch of other stuff. Check out our guide to completely manipulating your WordPress RSS feed.

How You Can Reduce Blog Content Scraping and Possibly Prevent It

Considering if you take our approach of lots of internal linking, adding affiliate links, rss banners and such chances are that you will reduce content scraping to good measure. If you take Jeff Starr’s suggestion of redirecting content scrapers, that too will stop those scrapers. Aside from what we have shared above, there are a few other tricks that you can use.

Full vs. Summary RSS Feed

There has been a debate in the blogging community whether to have full RSS feed or summary RSS feed. We are not going to go into much details about that debate, however one of the PROS of having a Summary Only RSS feed is that you prevent content scraping. You can change the settings by going to your WordPress admin panel and going under Settings » Reading. Then change the setting For each article in a feed show: Summary.
Note: We have full feed because we care more about our RSS readers than the spammers.

Trackback SPAM

Trackbacks and Pingbacks definitely had great uses however, they are now constantly being abused. Often themes display trackbacks and pingbacks under or among the comments. This gives the spammer an incentive to scrape your site and send trackbacks. If you mistakenly approves it, then they get a backlink and mention from your site. Here is how you can disable Trackbacks on all future posts. Here is an article that will show you how to disable trackbacks and pings on existing WordPress posts as well.

Is Content Scraping Ever Good?

It can be. If you see that you are making money from the scraper’s site, then sure it can be. If you see a lot of traffic from a scraper’s site, then it can be. In most cases however, it is not. You should always try to get your content taken off. But you will realize as your blog gets larger, it is almost impossible to keep track of all content scrapers. We still send out DMCA complaints, however we know that there are tons of other sites that are stealing our content that we just cannot keep up with.
What are your thoughts? Do you use any other mechanics to prevent content scraping? Would love to hear your thoughts.

How to Move Your Site from Joomla to WordPress

How to Move Your Site from Joomla to WordPress
A lot of people use Joomla to manage and publish their websites. While Joomla is a good platform, it is definitely not for everyone. Maybe you are among those users who have decided that you want to switch from Joomla to WordPress. You have heard a lot of people talking about WordPress and it’s ease of use. You want to utilize the power of WordPress plugins and themes. Well if you want to migrate your Joomla site to WordPress, then you are in the right place. In this article, we will show you how to move your site from Joomla to WordPress.
First thing you need to do is choose a web host and install WordPress. Once you have WordPress up and running, go to the WordPress admin area to install and activate FG Joomla to WordPress plugin. (Learn how to install plugins in WordPress).
After activating the plugin, go to Tools » Import. You will see a list of import tools available for your WordPress installation. Click on Joomla (FG) from the list of available tools.
Now you have reached the Joomla Importer for WordPress page. On this page, you need to provide your Joomla website and database information.
Provide your Joomla website database information
You can get the database settings from your Joomla website’s administration area, under Global Configuration » Server tab. This information is also stored inconfiguration.php file in your Joomla website’s root folder. You can access this file by connecting to your website using an FTP client and openingconfiguration.php in a text editor like notepad.
Getting your database settings from Joomla Administration area
After providing your database information scroll to “Behavior”. If you want to import media files such as images from Joomla to WordPress make sure that you have checked Force media import option. Finally click on “Import content from Joomla to WordPress” button.
Import content and media from Joomla to WordPress
The plugin will run a script and start importing your content from Joomla to WordPress. Depending on how much content you have, the import process may take some time. Once it is completed you will see a notice like this:
Successfully imported content form Joomla to WordPress
Once you have imported all your content from Joomla into WordPress, the next step is to fix all broken internal links. Scroll down to the bottom of the Joomla (FG) importer page and click on Modify internal links button.
Fix broken internal links after importing content from Joomla to WordPress

Troubleshooting Joomla to WordPress Import

  • The most common error people report during the import is “Fatal error: Allowed memory size of ****** bytes exhausted”. You can easily fix WordPress memory exhausted error.
  • If you see database connection errors then you need to recheck your database settings and make sure you are using correct login credentials.
  • Sometimes importing media may not work because your web host may have disabled allow_url_fopen directive in php.ini.
We hope that this article helped you move your site from Joomla to WordPress. If you need help, you will find plenty of tutorials in our archives. WPBeginner is the largest free WordPress tutorials site for beginners, and we are excited for you to join the WordPress community.

How to Create and Setup Google+ Brand Page for Your WordPress Site

How to Create and Setup Google+ Brand Page for Your WordPress Site
We heard the buzz about Google+ few months back. It was invite only and very limited. They were not allowing any business to join. Some businesses created a profile as a personal account, and they were all banned. Finally Google has given an official go-ahead to all businesses. You can now create your own Google+ Brand page. Don’t believe us? Check out WPBeginner Google+ Brand page to see it for yourself. In this article, we will show you how to create and setup your Google+ Brand page for your WordPress site.

1. Create a Google+ Brand Page

First thing you need to do is signin to your Google account and then head to:
Click on the Create your Google+ Page button as demonstrated in the image below:
Create your Google+ Page

2. Pick a Category for your Google+ Page

Pick a Category for Google+ Page
On the second step, you will be asked to pick a category. You can choose from:
Local Businesses or Place
Great for hotels, restaurants, places, stores, any other local service business.
Product or Brand
Great for any other product that is not local. For example, WPBeginner is an online brand.
Company, Institution or Organisation
Great for company pages, non-profits, organizations, schools, etc.
Arts, Entertainment or Sports
Great for books, bands, movies, shows etc. This can be a very broad category.
Other
If you can’t fit your business in any of the categories above, then you put it in here.

3. Adding your Information for your Google+ Brand Page

Once you select your category. We selected Product or Brand, then you will be prompted to fill out additional information.
Google+ Add Info for Brand Pages
Fill out your page name, Website, pick a category. You can select who can view your page. The default is any google user, but you can restrict it to 18+ or 21+.

4. Tagline and Photo for your Google+ Brand Page

After you fill out your information, you will be asked to enter a tagline and a photo for your brand.
Google+ Tagline and Photo

5. Spread the Word out and Tweak Things around

You will be prompted to spread the word out to your friends. You should. After that, you will be given a URL for your page. Sadly it is no Vanity URL yet. I wish that we can have something like plus.google.com/wpbeginner but you can’t just yet. You will be given a string of random characters like the one we have:
But you can use Bit.ly to shorten it. If you have a customized short URL for your site, then you can get really creative like this:
If you are using Simple URLs plugin or something similar, you can create something like this:
There is a photostrip similar to Facebook. Except you can control which order they are displayed in. It would be interesting to see what people come up with. We are trying to think of creative uses ourselves.
Hopefully this guide helped you in creating a Google+ Brand page.

How to Enable oEmbed in WordPress Text Widgets

How to Enable oEmbed in WordPress Text Widgets
Recently, one of our users asked us how to enable oEmbed in WordPress text widgets. oEmbed is a protocol that allows your blog to ask an oEmbed enabled website to provide HTML needed to embed dynamic content. In simple words, it allows you to just paste a YouTube video URL in a blog post and let WordPress embed it automatically. You can adjust the oembed maximum width manually, ordynamically change oEmbed content width and height. However, you can not embed content in a text widget using oEmbed. In this article, we will show you how to enable oEmbed in WordPress text widgets.
All what you have to do is add the following code in your theme’s functions.phpfile or a site specific plugin:
1add_filter( 'widget_text'array$wp_embed'run_shortcode'), 8 );
2add_filter( 'widget_text'array$wp_embed'autoembed'), 8 );
Once you have done that, then you are done. You have successfully enabled oEmbed for text widgets. You can head over to Appearance » Widgets to test it. Simply add a Youtube video URL in your text widget, and watch the magic.
For those of you who want to know what this code does, it simply adds a filterwidget_text allowing text widgets to run shortcode for oEmbed and auto-embed content.
For those who don’t like to deal with code, then you can simply activate Text Widget oEmbed plugin. It literally does the same thing. The plugin only has 2 lines of code that we shared above.
We hope that this article helped you enable oEmbed in text widgets. If you have any questions or comments, then please let us know by leaving a comment below.

How to Add a News Ticker in WordPress

How to Add a News Ticker in WordPress
News tickers sometimes referred to as slides are located at the bottom of most television news networks to highlight breaking news, daily trends, etc. You can use a news ticker on your WordPress website to highlight special deals, popular posts, or anything else. In this article, we will show you how to add a rotating or scrolling news ticker in WordPress.
First thing you need to do is install and activate the Ditty News Ticker plugin. Upon activation, the plugin adds a News Ticker menu item in your WordPress admin. Bring your mouse over to the menu item and click on the Add New link to add a news ticker.
On the next screen, you will have the ability give this particular news ticker a name, ticker text and link. For each ticker, you can add as many ticker items as you like. If you want to add another ticker item, then press the green + button to add the next item on the ticker. Once you are done adding ticker items, scroll down to Ticker Mode. There are three different ticker modes available. Scroll, rotate, and list. The scroll mode is the default one because it is the most commonly used in television networks. Rotate is another good option if you want to show one ticker at a time.
Adding news ticker items
If you want to adjust the behavior of the news ticker, then scroll down to the Scroll settings panel. This panel allows you to configure scroll speed and dimensions. You can also choose the spacing between each ticker items and pause items when a user brings their mouse over the ticker.
News ticker scroll settings
The plugin generates a shortcode as well as a PHP function for each news ticker you create. You can either use the shortcode inside a post, page, sidebar widget, or you can directly insert the PHP function in your theme files.
News ticker shortcode and php function
Once you insert the ticker shortcode or PHP function, then it should work. We hope that this article helped you add a news ticker to your WordPress website. Would you use a news ticker on your website, or do you rather prefer our sticky floating footer bar? Let us know by leaving a comment below.

How to Add Read it Later Buttons to Your WordPress Posts

How to Add Read it Later Buttons to Your WordPress Posts
We all know that adding tools to help users share and save content, can improve user experience and significantly impact the rate of return visitors. Whether it is aPinterest buttonGoogle+ Button or a Facebook Like button, the purpose is to encourage users to engage with your content. In this article, we will show you how to add a read it later button to your WordPress posts. This will provide your readers with a convenient way to read your content later on any device.
We will be a using an online bookmarking tool called Pocket to add the read it later buttons in WordPress. Pocket is available for all devices (iOS, Android, Kindle, PC, and as browser add-on).
Pocket - Read it Later

Adding Pocket – Read it Later Button with Plugin

First thing you need to do is install and activate the Pocket Read it Later Linksplugin. After activating the plugin you can go to Settings » Pocket Read it Later Links for configuration as to where you want to display the read it later buttons.
Pocket Read it Later Links
You can choose to add the read it later buttons on all pages, only on homepage, only on single posts and pages, or you can even control the output in your theme by using the function they have provided. By default the read it later button is aligned on the right hand side of your content. If you want to customize it, then you can use the Custom CSS option box. An example of the read it later button would look like this:
Read it Later Button in Post

Adding Pocket – Read it Later Button without a Plugin

Even though the plugin we mentioned above works fine, it generates a simple unbranded button that does not match the official Pocket branding. If you are familiar with how WordPress themes work, and you are comfortable with making tweaks, then you can use the official GetPocket button.
Official Pocket Buttons
Go to Pocket for Publishers page to get the code for your Pocket button. There are three layout options available. You may be using other social sharing plugins (such astwitter) so choose layout which matches the other social buttons on you site.
Copy the code and paste it in your theme files where ever you want to display it. If you only want to display it on your single post pages, then you would paste the code in your single.php file.
We hope that this article helped you add a read it later button to your WordPress posts. Would you add something like this on your site? Let us know by leaving a comment below.