How to Create and Setup Google+ Brand Page for Your WordPress Site

We heard the buzz about Google+ few months back. It was invite only and very limited. They were not allowing any business to join. Some businesses created a profile as a personal account, and they were all banned. Finally Google has given an official go-ahead to all businesses. You can now create your own Google+ Brand page. Don’t believe us? Check out WPBeginner Google+ Brand page to see it for yourself. In this article, we will show you how to create and setup your Google+ Brand page for your WordPress site.
1. Create a Google+ Brand Page
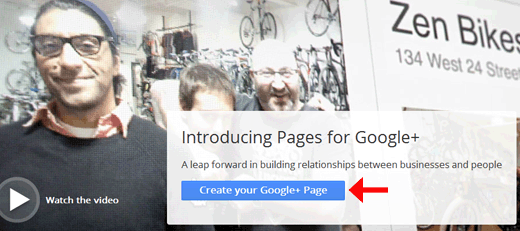
First thing you need to do is signin to your Google account and then head to:
Click on the Create your Google+ Page button as demonstrated in the image below:

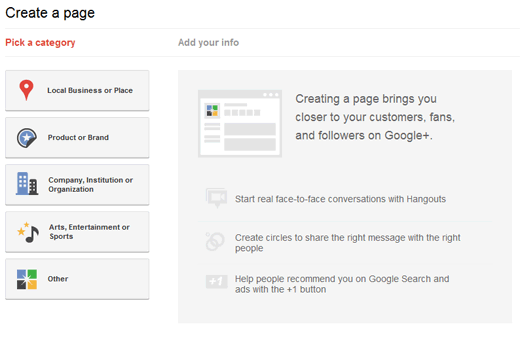
2. Pick a Category for your Google+ Page

On the second step, you will be asked to pick a category. You can choose from:
Local Businesses or Place
Great for hotels, restaurants, places, stores, any other local service business.
Product or Brand
Great for any other product that is not local. For example, WPBeginner is an online brand.
Company, Institution or Organisation
Great for company pages, non-profits, organizations, schools, etc.
Arts, Entertainment or Sports
Great for books, bands, movies, shows etc. This can be a very broad category.
Other
If you can’t fit your business in any of the categories above, then you put it in here.
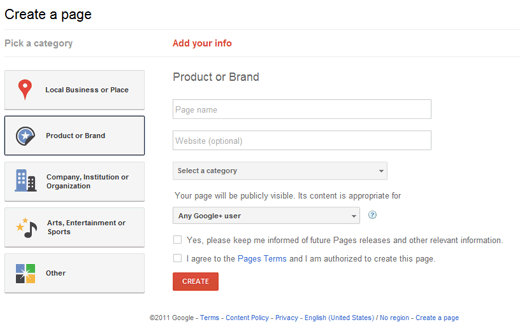
3. Adding your Information for your Google+ Brand Page
Once you select your category. We selected Product or Brand, then you will be prompted to fill out additional information.

Fill out your page name, Website, pick a category. You can select who can view your page. The default is any google user, but you can restrict it to 18+ or 21+.
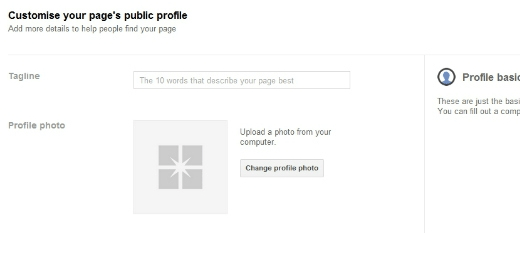
4. Tagline and Photo for your Google+ Brand Page
After you fill out your information, you will be asked to enter a tagline and a photo for your brand.

5. Spread the Word out and Tweak Things around
You will be prompted to spread the word out to your friends. You should. After that, you will be given a URL for your page. Sadly it is no Vanity URL yet. I wish that we can have something like plus.google.com/wpbeginner but you can’t just yet. You will be given a string of random characters like the one we have:
But you can use Bit.ly to shorten it. If you have a customized short URL for your site, then you can get really creative like this:
If you are using Simple URLs plugin or something similar, you can create something like this:
There is a photostrip similar to Facebook. Except you can control which order they are displayed in. It would be interesting to see what people come up with. We are trying to think of creative uses ourselves.
Hopefully this guide helped you in creating a Google+ Brand page.


 My name is MUHAMMAD ZEESHAN I'm student of Bsc(cs). I am 18 years old now. Currently, i live in Bahawalpur, Pakistan. By Profession I'm a Web Designer, Graphic Designer, Computer Instructor Blogger and Video Editor.
Contact:03464723239
0 comments: